
Hi everyone!
In latest article I presented the perimeter of “Project Ramuh”, now time has come to describe its walking skeleton, and write our first lines of code.
Walking skeleton

For the (few) people that may not already know the concept of a walking skeleton, it is a form of “Proof-Of-Concept” for the architecture of your application, that can be tested from end-to-end. Alistair Cockburn, one of the initiators of the Agile movement in software development described it far more precisely than I could:
A Walking Skeleton is a tiny implementation of the system that performs a small end-to-end function. It need not use the final architecture, but it should link together the main architectural components. The architecture and the functionality can then evolve in parallel.
So the idea is to build the smallest application that provides an end-to-end feature and that will grow when new features will be created and deployed.
Ramuh skeleton
We are at the beginning of the project, so time has come to talk a little bit of what this walking skeleton will be for Project Ramuh.
From the business point of view, I decided to focus on something that may have a big impact on the user: the graphical representation of the grid. People operating the grid are used to have geographical representation of the grid, like the one that can be found on the ENTSO-E website. That is also the reason why it was one of the first component PowSyBl team developed in their demo application.
PowSyBl framework already provides some tools for dealing with geographical coordinates of the grid devices. But it focuses on real geographical coordinates, and database storage of these infos. However, there are many reasons that may explain why these data are not available:
- Usage of fake test datasets
- Incomplete datasets, or ones using a limited representation, as it is the case for UCTE-DEF format that may not contain the real coordinates information
- Anonymised datasets
These cases will definitely occur as soon as people testing the application will use their own datasets. For this reason, the first chapters of this project will focus on giving a “good enough” representation of the grid on a geographical map, without having access to real GPS coordinates.
But this is too big for a walking skeleton. So for this first chapter, I limited the scope to a smaller end-to-end function, expressed as a simple User Story.
As a user of the application, I can choose a grid file from my computer and then an overlay appears on the geographical map that highlights the countries which data are listed in the file.
Architecture
Decomposition into micro-services
We will start with two simple micro-services:
- The web application that will only contains a geographical map on which overlays will be drawn
- The grid overlay provider application that will perform the conversion from a grid file to the overlays to be put on the web application

Deployment of this walking skeleton will be discussed in next article, so for this chapter, our services are deployed locally, on the developer’s computer.
Creating test cases
In order to validate our walking skeleton, we will need test datasets. As I will be using PowSyBl framework to import the grid file, I can use any grid format with importer available in the framework. Available importers are listed in the PowSyBl documentation.
I will use files from all available formats, to ensure the application can be extended easily to any future importer that may be developed in PowSyBl. These input datasets are available on GitHub.
- 20170215_0830_2d4_uc1.uct: A fictive UCTE test case that contains devices in France, Belgium, Netherlands and Germany.
- ieee14.xiidm: A simple, purely fictive XIIDM dataset that do not define any country association to the devices.
- nordic32.xiidm: An XIIDM file with a small dataset that contains devices in Norway, Denmark, Belgium and France.
- SmallGridTestConfiguration.zip: A simple GB network in CGMES format.
Map overlay interface definition
The map overlay will be defined in GeoJson format. A dataset already exists that contains the definition of countries geometry in GeoJson format. It will be saved as a resource of our application and filtered to return information only for the countries found in the test case.
License
An important element while starting the project is the software license that will be attached to the project. I decided to align with PowSyBl and FARAO license, which is MPLv2. This will have impacts on available components and libraries.
Grid overlay provider application
I decided to start the developement by the back-end microservice.
This service will be responsible to deliver a GeoJson overlay to be used on our web application map, based on an input grid file.
Application structure
Grid overlay provider application will be developed in Java with Spring boot, to benefit from PowSyBl framework’s grid importers. The application will be purely stateless.
I created the project using Spring Initializr.
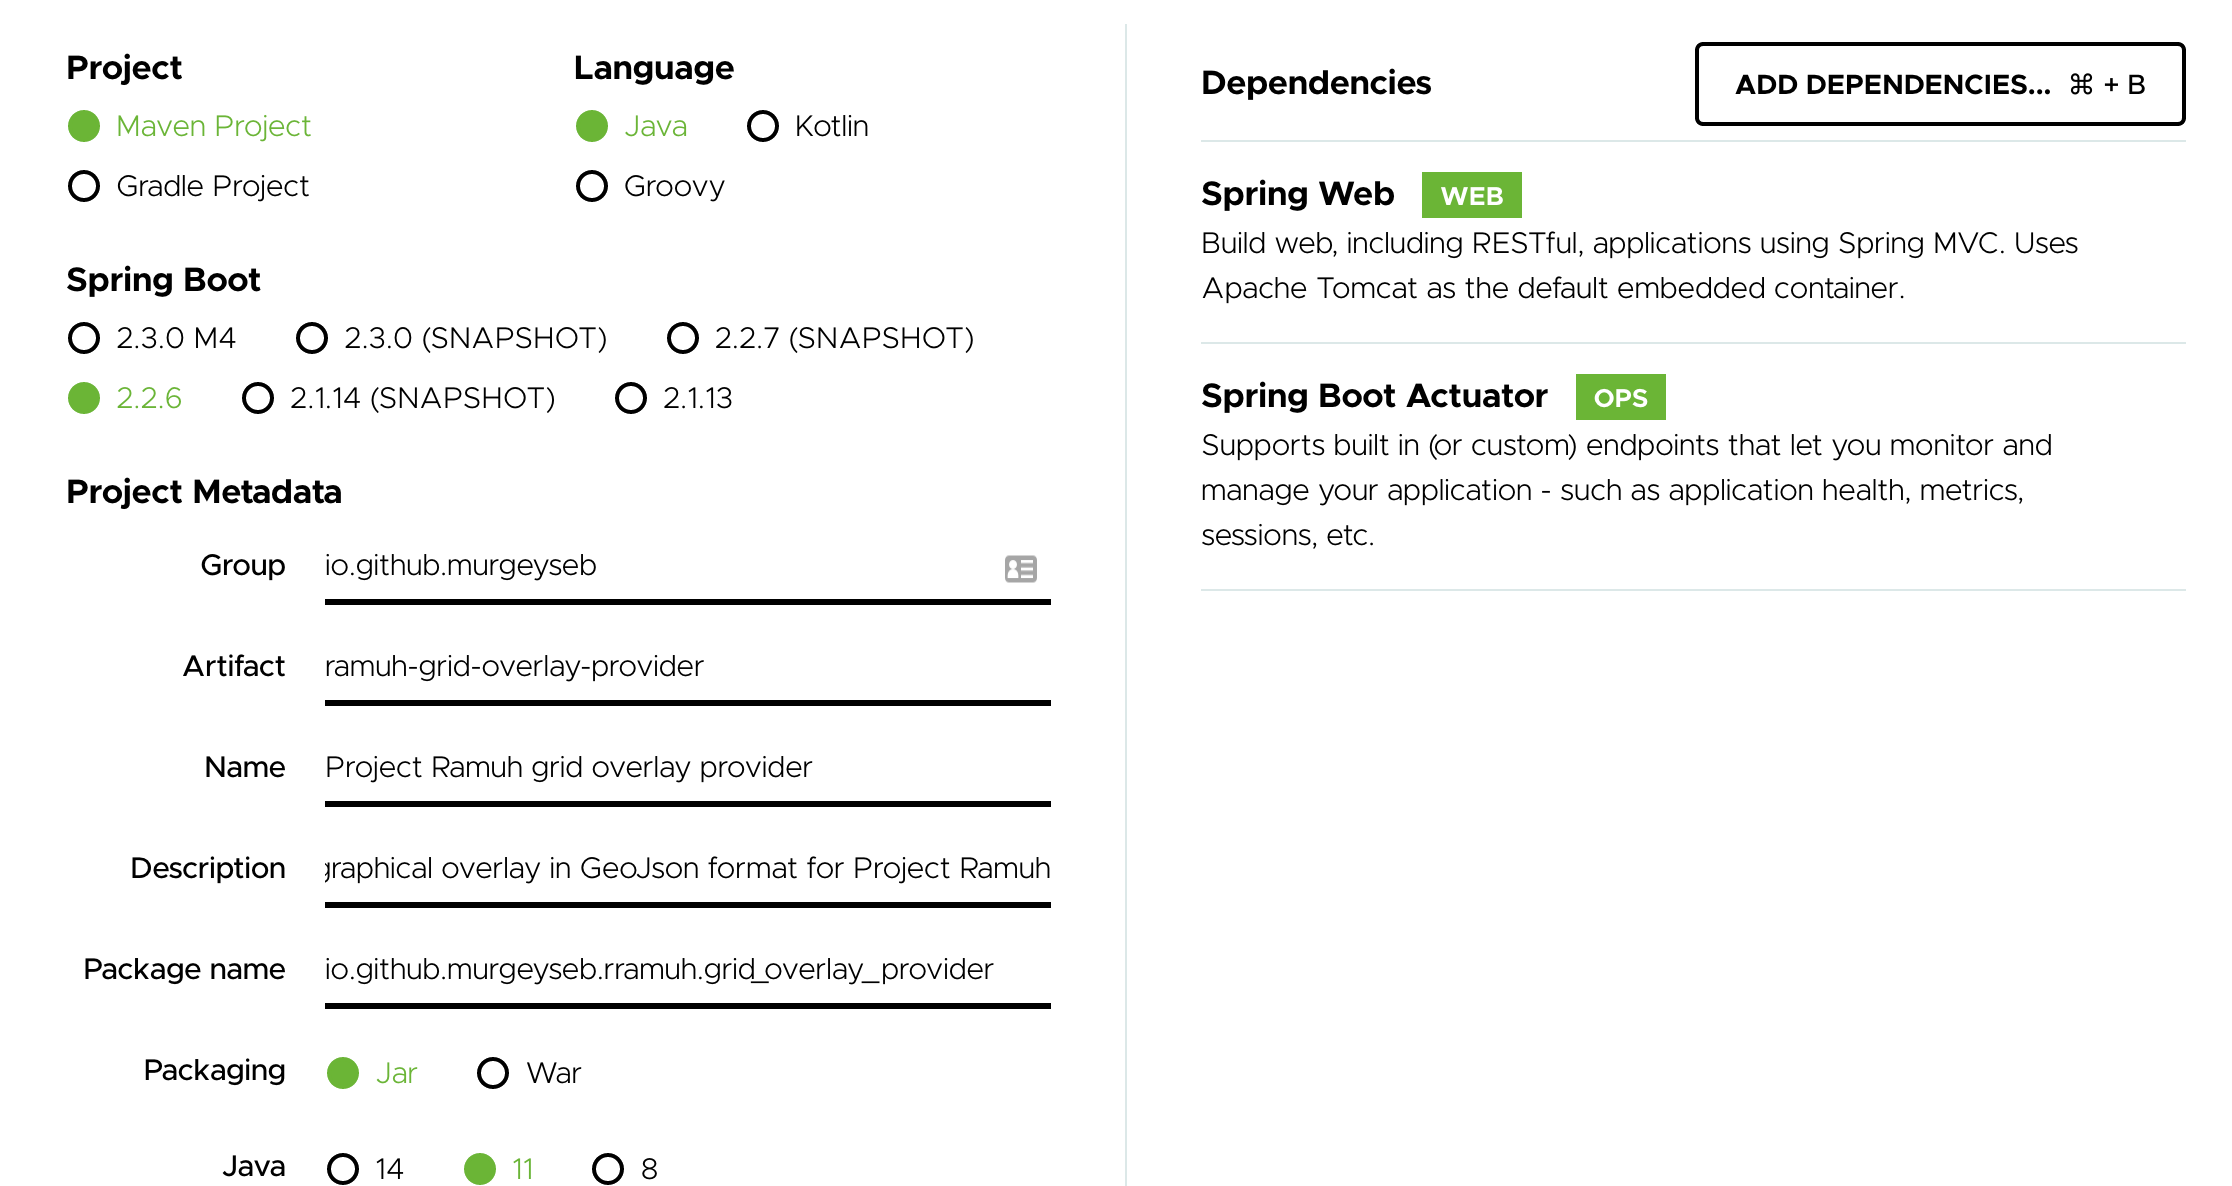
I also chose to install Spring Actuator, to get some pre-defined endpoints and features for monitoring our application.
I started by creating a controller, with a POST request that returns a GeoJson FeatureCollection, based on an input MultipartFile. The actual creation of GeoJson object is delegated to a service bean, injected in the controller’s constructor.
package io.github.murgeyseb.ramuh.grid_overlay_provider;

import org.geojson.FeatureCollection;
import org.springframework.web.bind.annotation.PostMapping;
import org.springframework.web.bind.annotation.RestController;
import org.springframework.web.multipart.MultipartFile;

import java.io.IOException;

@RestController
public class GridOverlayController {
    private GridOverlayService gridOverlayService;

    public GridOverlayController(GridOverlayService gridOverlayService) {
        this.gridOverlayService = gridOverlayService;
    }

    @PostMapping("/overlay")
    public FeatureCollection overlayCreator(MultipartFile gridFile) throws IOException {
        return gridOverlayService.generateOverlayForFile(gridFile);
    }
}
Application resource loading
As the GeoJson file that contains all the countries of the world geometries is quite big, I created a dedicated component to load it at the application start.
package io.github.murgeyseb.ramuh.grid_overlay_provider;

import com.fasterxml.jackson.databind.ObjectMapper;
import org.geojson.Feature;
import org.geojson.FeatureCollection;
import org.slf4j.Logger;
import org.slf4j.LoggerFactory;
import org.springframework.stereotype.Component;

import javax.annotation.PostConstruct;
import java.io.IOException;
import java.util.HashMap;
import java.util.Map;

@Component
public class CountriesGeometryLoader {
    private static final String COUNTRIES_RESOURCE = "/countries.geojson";
    private static final Logger LOGGER = LoggerFactory.getLogger(CountriesGeometryLoader.class);

    private final Map<String, Feature> countriesGeometry = new HashMap<>();

    @PostConstruct
    private void loadCountriesGeometry() throws IOException {
        LOGGER.info("Loading countries geometry...");
        FeatureCollection featureCollection = new ObjectMapper().readValue(getClass().getResourceAsStream(COUNTRIES_RESOURCE), FeatureCollection.class);
        featureCollection.getFeatures()
                .forEach(this::addFeature);
        LOGGER.info("Countries geometry has been loaded.");
    }

    private void addFeature(Feature feature) {
        if (feature.getProperties().containsKey("ISO_A3")) {
            countriesGeometry.put(feature.getProperties().get("ISO_A3").toString(), feature);
        } else {
            LOGGER.warn("Feature '{}' in countries geometry file was not associated to any country code", feature.getId());
        }
    }

    public Map<String, Feature> getCountriesGeometry() {
        return countriesGeometry;
    }
}
This way, end user will never experience loading time when requesting the countries geometry.
Mapping between PowSyBl Country and ISO3 country code
IIDM Country is based on an ISO2 country code, whereas the dataset used for countries geometry uses ISO3 country codes.
I created a small utility class to do the conversion. A great thank to the author of this blog article for the conversion trick.
package io.github.murgeyseb.ramuh.grid_overlay_provider;

import com.powsybl.iidm.network.Country;

import java.util.Locale;

public final class CountryIsoMapper {

    private CountryIsoMapper() {
        throw new IllegalStateException("Utility class are not meant to be instantiated");
    }

    public static String countryToIso3CountryCode(Country iidmCountry){
        Locale locale = new Locale("", iidmCountry.toString());
        return locale.getISO3Country();
    }
}
Service implementation
I will detail a bit more this part, that can also be seen as a small tutorial on dealing with grid files using PowSyBl framework.
The internal grid model used in PowSyBl is called IIDM. The framework provides importers and exporters to/from this format, and libraries that rely heavily on this internal grid modeling. For more information about it, a documentation is available on the project’s website.
First I need to load the IIDM network from the input grid file. For this, we will rely on PowSyBl IIDM importers API. To do so I need the following dependencies in pom.xml file:
...
    <!-- IIDM grid modeling API -->
    <dependency>
        <groupId>com.powsybl</groupId>
        <artifactId>powsybl-iidm-api</artifactId>
        <version>${powsybl.version}</version>
    </dependency>

    <!-- IIDM importers API -->
    <dependency>
        <groupId>com.powsybl</groupId>
        <artifactId>powsybl-iidm-converter-api</artifactId>
        <version>${powsybl.version}</version>
    </dependency>


    <!-- Implementation to be used for IIDM network -->
    <dependency>
        <groupId>com.powsybl</groupId>
        <artifactId>powsybl-iidm-impl</artifactId>
        <version>${powsybl.version}</version>
        <scope>runtime</scope>
    </dependency>

    <!-- CGMES converters plugin -->
    <dependency>
        <groupId>com.powsybl</groupId>
        <artifactId>powsybl-cgmes-conversion</artifactId>
        <version>${powsybl.version}</version>
        <scope>runtime</scope>
    </dependency>
    <dependency>
        <groupId>com.powsybl</groupId>
        <artifactId>powsybl-triple-store-impl-rdf4j</artifactId>
        <version>${powsybl.version}</version>
        <scope>runtime</scope>
    </dependency>

    <!-- XIIDM converters plugin -->
    <dependency>
        <groupId>com.powsybl</groupId>
        <artifactId>powsybl-iidm-xml-converter</artifactId>
        <version>${powsybl.version}</version>
        <scope>runtime</scope>
    </dependency>

    <!-- UCTE-DEF converters plugin -->
    <dependency>
        <groupId>com.powsybl</groupId>
        <artifactId>powsybl-ucte-converter</artifactId>
        <version>${powsybl.version}</version>
        <scope>runtime</scope>
    </dependency>

    <!-- PowSyBl framework configuration plugin -->
    <dependency>
        <groupId>com.powsybl</groupId>
        <artifactId>powsybl-config-classic</artifactId>
        <version>${powsybl.version}</version>
        <scope>runtime</scope>
    </dependency>
...
Note that only powsybl-iidm-api and powsybl-iidm-converter-api artifacts are needed at compile time, all other dependencies are implementations to be used for the IIDM network object, for the powsybl framework configuration or the actual importers.
Then I can import a grid model from the multipart file with the following code:
Network network = Importers.loadNetwork(multipartFile.getOriginalFilename(), multipartFile.getInputStream());
However, this method does not work in case of CGMES formatted grid models, which are stored as multiple entries in a ZIP archive. I used a slightly more complex version, that enforces us to create temporary files on the server.
  private Network loadGridFile(MultipartFile gridFile) {
      try {
          Path tempDir = Files.createTempDirectory("grid-overlay-provider");
          Path tempFile = Path.of(tempDir.toString(), gridFile.getOriginalFilename());
          gridFile.transferTo(tempFile);
          Network network = Importers.loadNetwork(tempFile);
          Files.delete(tempFile);
          Files.delete(tempDir);
          return network;
      } catch (IOException e) {
          throw new UncheckedIOException(e);
      }
  }
The set of countries contained in the network object can be retrieved using network.getCountries() method.
The final code for the service is quite short. It relies on the loaded geometries map, by injecting CountriesGeometryLoader bean in the service and only adds to the final FeatureCollection countries geometry which correspond to countries actually listed in the network object.
package io.github.murgeyseb.ramuh.grid_overlay_provider;

import com.powsybl.iidm.import_.Importers;
import com.powsybl.iidm.network.Network;
import org.geojson.FeatureCollection;
import org.springframework.stereotype.Service;
import org.springframework.web.multipart.MultipartFile;

import java.io.IOException;
import java.io.UncheckedIOException;
import java.nio.file.Files;
import java.nio.file.Path;
import java.util.stream.Collectors;

@Service
public class GridOverlayService {
    private final CountriesGeometryLoader countriesGeometryLoader;

    public GridOverlayService(CountriesGeometryLoader countriesGeometryLoader) {
        this.countriesGeometryLoader = countriesGeometryLoader;
    }

    public FeatureCollection generateOverlayForFile(MultipartFile gridFile) throws IOException {
        Network network = loadGridFile(gridFile);
        FeatureCollection featureCollection = new FeatureCollection();
        featureCollection.addAll(
                network.getCountries().stream()
                        .map(CountryIsoMapper::countryToIso3CountryCode)
                        .map(isoA3Code -> countriesGeometryLoader.getCountriesGeometry().get(isoA3Code))
                        .collect(Collectors.toList())
        );
        return featureCollection;
    }

    private Network loadGridFile(MultipartFile gridFile) {
        try {
            Path tempDir = Files.createTempDirectory("grid-overlay-provider");
            Path tempFile = Path.of(tempDir.toString(), gridFile.getOriginalFilename());
            gridFile.transferTo(tempFile);
            Network network = Importers.loadNetwork(tempFile);
            Files.delete(tempFile);
            Files.delete(tempDir);
            return network;
        } catch (IOException e) {
            throw new UncheckedIOException(e);
        }
    }
}
Finally, I can launch the application and validate it using with my test cases.
e.g. using curl
curl -F gridFile=@20170215_0830_2d4_uc1.uct http://localhost:8080/overlay
Personally, I am used to validate my REST API with Postman app.
Now we are done with the first version of our back-end microservice. The final version is available on GitHub. It’s now time to deal with application’s front-end.
Ramuh front application
Technologies
Project Ramuh web application will be a Single Page Application, developed with ReactJS.
The main component, as discussed in the beginning of the post, will be the grid map. We do not have high requirements in terms of performance and scalability yet. However, we do have requirements in terms of license. The component used must be open-source and compatible with our MPLv2 license.
After some researches, I decided to start with Leaflet, and its React wrapper. I do not close the door to a change in the component used if hard constraints appear in the future.
Creating the app
I created the project with create-react-app script.
npx create-react-app ramuh-front
cd ramuh-front
npm start
A skeleton of web application has been created, that we can reach on http://localhost:3000. The playground is built, time has come to create our own skeleton.
Creating the map
First thing needed is to remove all the App.js file content, and fill it with our geographical map.
Let’s install Leaflet and React-Leaflet.
npm install leaflet react-leaflet
Then, I created a GridMap component, that will wrap the geographical map creation.
import React from 'react'
import { Map, TileLayer } from 'react-leaflet'
function GridMap(props) {
function initialCenter() {
var initialLat = process.env.REACT_APP_INITIAL_MAP_CENTER_LAT || 49.8
var initialLng = process.env.REACT_APP_INITIAL_MAP_CENTER_LNG || 16.6
return [initialLat, initialLng]
}
function initialZoom() {
return process.env.REACT_APP_INITIAL_MAP_ZOOM || 4
}
return (
<Map center={initialCenter()} zoom={initialZoom()}>
<TileLayer
attribution='Tiles © Esri — Esri, DeLorme, NAVTEQ'
url='https://server.arcgisonline.com/ArcGIS/rest/services/Canvas/World_Light_Gray_Base/MapServer/tile/{z}/{y}/{x}'
maxZoom='16'
/>
</Map>
)
}
export default GridMap;
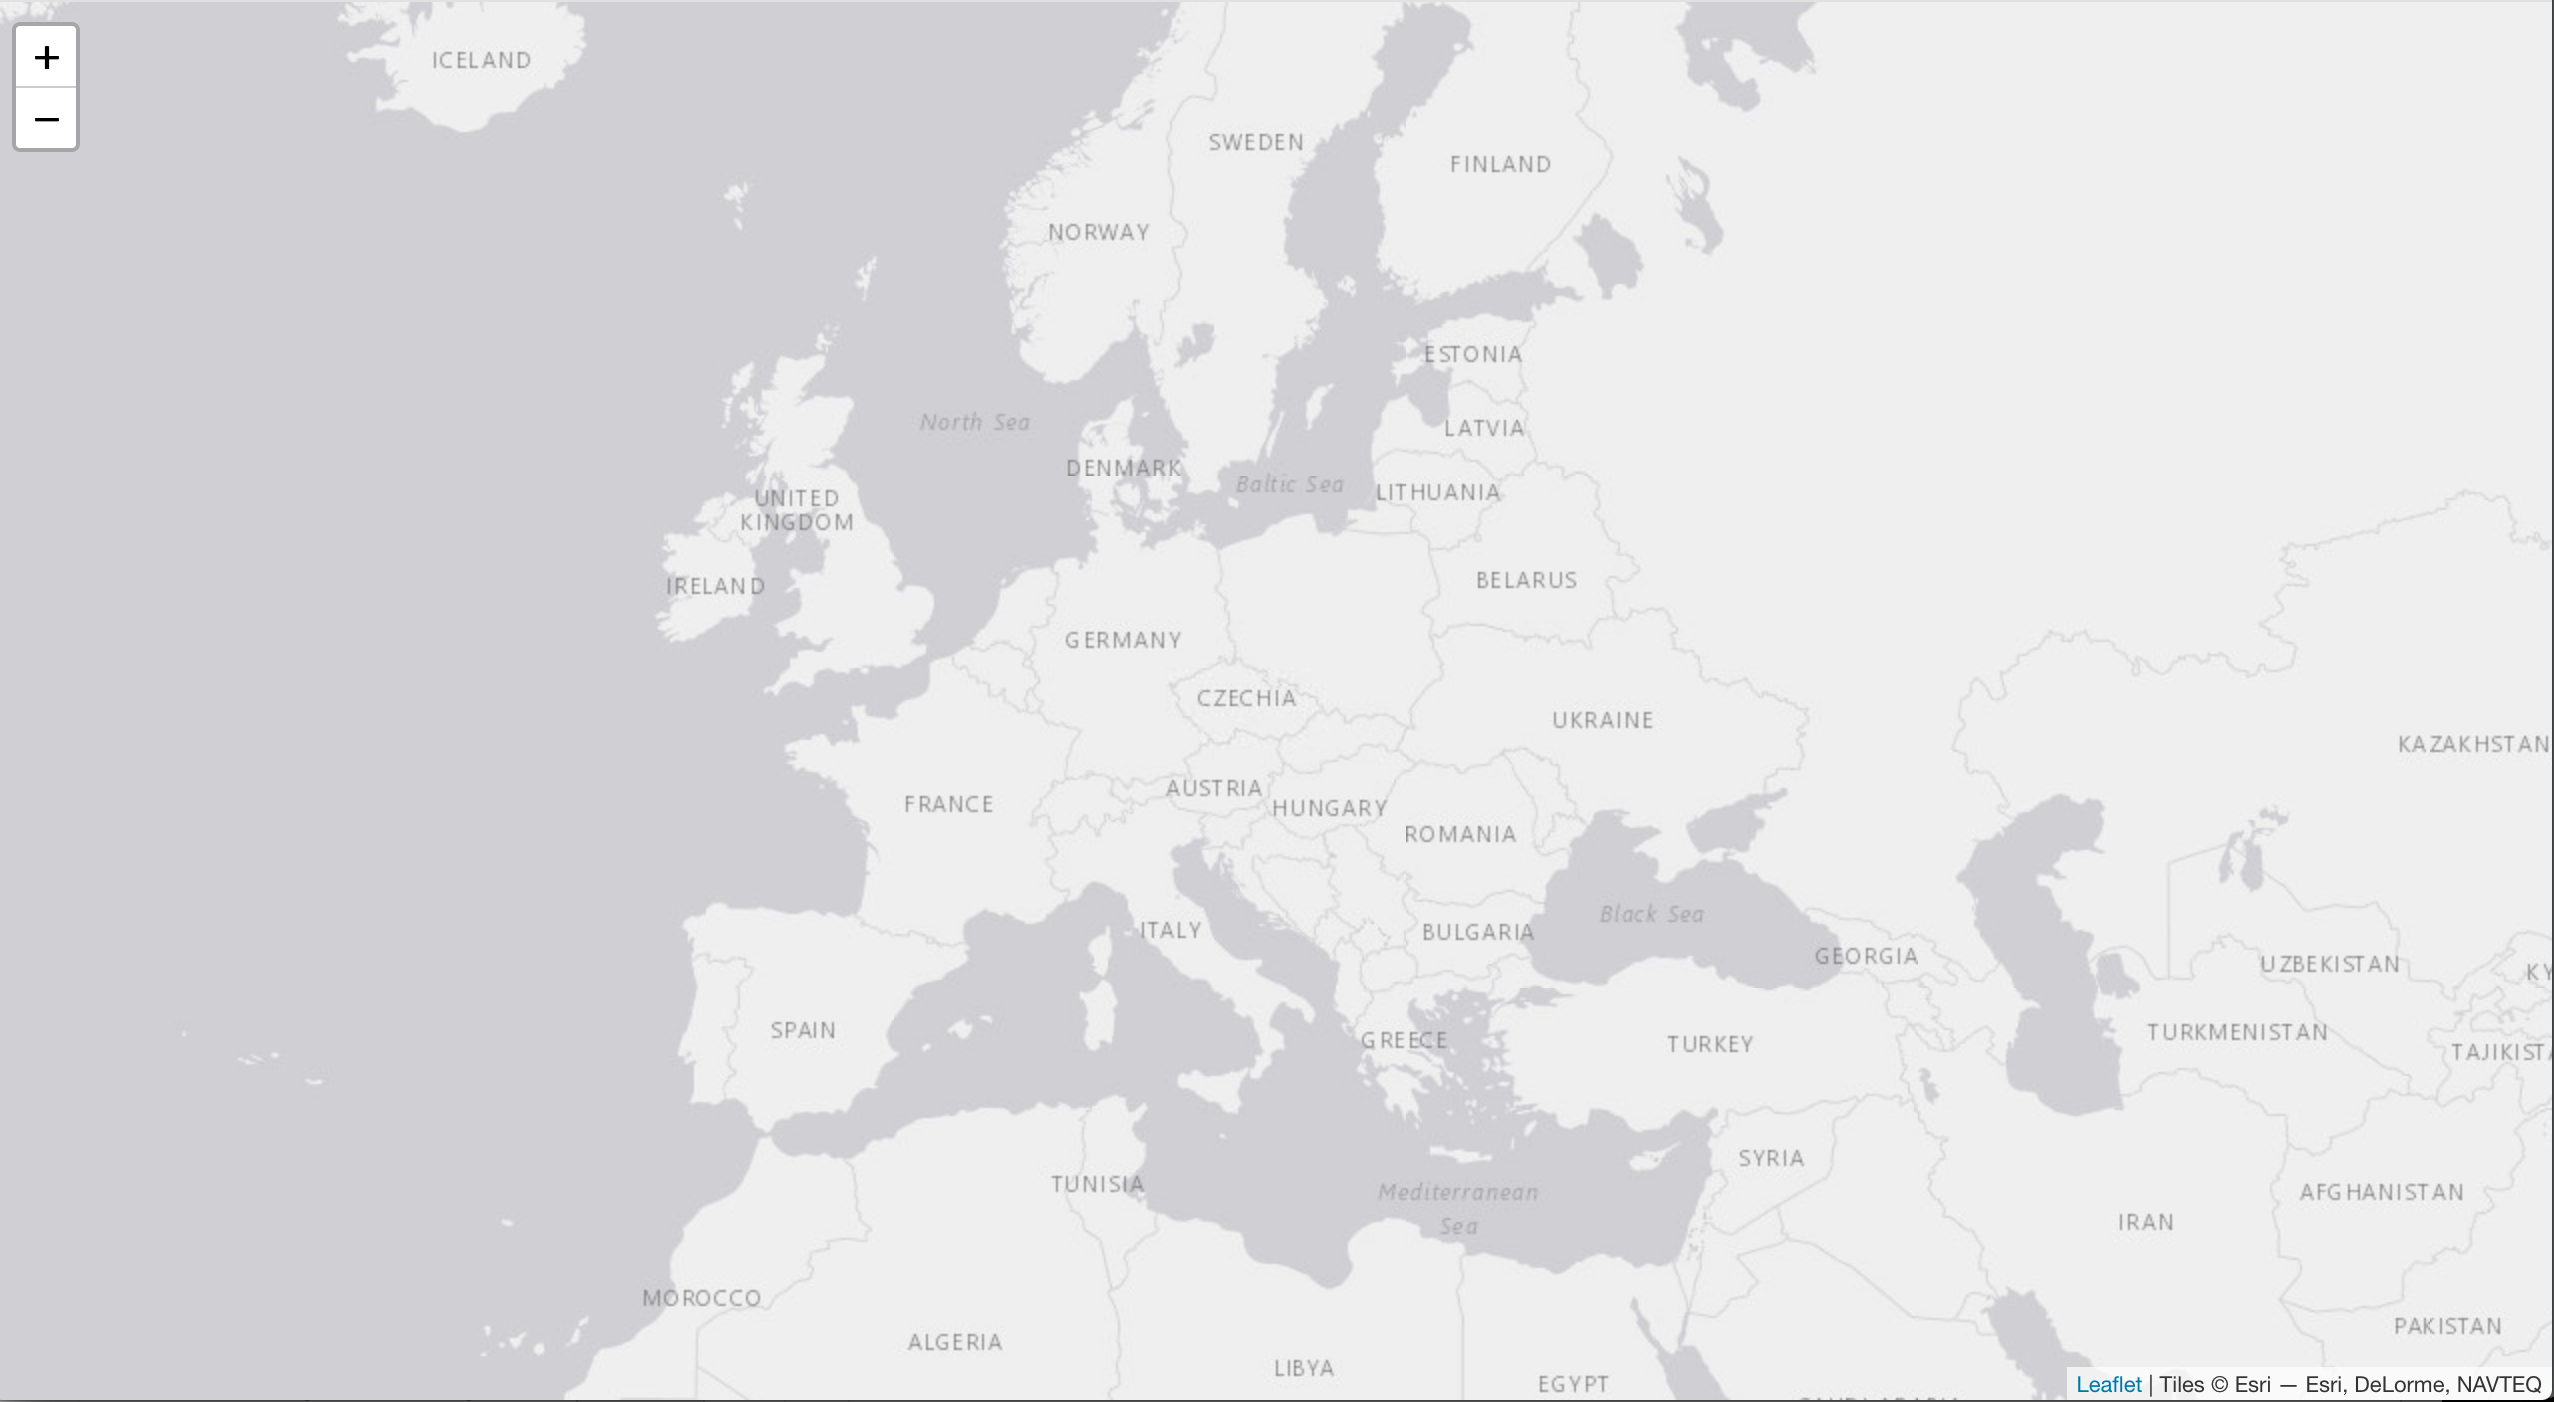
I used React environment variables to set initial viewport of the map. By default, it is centered on continental Europe, and quite large. This way, any deployment can specify its own starting point for the map center and zoom level. I chose neutral tiles from Esri, but many others are available. Do not forget to add the attribution property!
Then, I changed the App component to return our GridMap object.
function App() {
  return (
    <div className='App'>
        <GridMap id='mygridmap' />
      </DroppingArea>
    </div>
  );
Some CSS allows us to make the map fullscreen, as there is nothing more to show in our web application yet.
#mygridmap {
  height: 100vh;
  width: 100vw;
}

.leaflet-container {
  height: 100vh;
  width: 100vw;
}
I finally have my fullscreen map!
Providing input grid file
The solution chosen in order to select the input grid file is to use drag & drop feature over our created map.
I created a dedicated DroppingArea component for dealing with this feature, based on an exemple extracted from this nice post.
import React, { useState } from 'react'
import './DroppingArea.css'

function DroppingArea(props) {
  const [dragFiles, setDragFiles] = useState(0)
  const [dragCounter, setDragCounter] = useState(0)

  function handleDragIn(e) {
    e.preventDefault()
    e.stopPropagation()
    setDragCounter(dragCounter + 1)
    if (e.dataTransfer.items && e.dataTransfer.items.length > 0) {
      setDragFiles(e.dataTransfer.items)
    }
  }

  function handleDragOut(e) {
    e.preventDefault()
    e.stopPropagation()
    setDragCounter(dragCounter - 1)
    if (dragCounter > 0) return
    setDragFiles([])
  }

  function handleDragOver(e) {
    e.preventDefault()
    e.stopPropagation()
  }

  function handleDrop(e) {
    e.preventDefault()
    e.stopPropagation()
    setDragCounter(0)
    if (e.dataTransfer.files && e.dataTransfer.files.length === 1) {
      props.handleDrop(e.dataTransfer.files)
    }
    setDragFiles([])
  }

  function message() {
    if (props.message) {
      return props.message(dragFiles)
    } else {
      return 'Drop your file(s) here'
    }
  }

  function isValid() {
    if (props.isValid) {
      return props.isValid(dragFiles)
    } else {
      return true
    }
  }

  return (
    <div onDragEnter={ e => handleDragIn(e) }
        onDragLeave={ e => handleDragOut(e) }
        onDragOver={ e => handleDragOver(e) }
        onDrop={ e => handleDrop(e) }
        className='dropping-area'>
          { dragFiles.length > 0 &&
          <div className={ isValid() ? 'valid dashed-overlay' : 'invalid dashed-overlay' }>
            <div className='centered-label'>
              <div>{ message() }</div>
            </div>
          </div>
        }
      {props.children}
    </div>
  )
}

export default DroppingArea;
And associated CSS…
.dashed-overlay {
  border: dashed 4px;
  background-color: rgba(255,255,255,.8);
  position: absolute;
  top: 0;
  bottom: 0;
  left: 0;
  right: 0;
  z-index: 9999;
}

.centered-label {
  position: absolute;
  top: 50%;
  right: 0;
  left: 0;
  text-align: center;
  font-size: 36;
}

.dropping-area {
  display: inline-block;
  position: relative;
}

.invalid {
  border-color: red;
  color: red;
}

.valid {
  border-color: grey;
  color: grey;
}
Our component allows to deal files drop events, via the handleDrop callback props and some validity assessment via the isValid and message props.
I will use these later to prevent end user to drag & drop multiple files on our map.
Finally, I can enclose the created GridMap component in the newly created DroppingArea. This gives this new version for App.js file.
function App() {
  const [geojsonOverlay, setGeoJsonOverlay] = useState()
  const [geojsonLayerId, setGeoJsonLayerId] = useState()
  function handleDrop(files) {
    return
  }

  function message(items) {
    if (items.length > 1) {
      return 'Please choose a single file'
    } else {
      return 'Drop your network file here'
    }
  }

  function isValid(items) {
    if (items.length > 1) {
      return false
    } else {
      return true
    }
  }
  return (
    <div className='App'>
      <DroppingArea handleDrop={handleDrop} message={message} isValid={isValid}>
        <GridMap id='mygridmap' />
      </DroppingArea>
    </div>
  );
}

export default App;
Now that we can retrieve an input grid file using drag & drop, but there is still the drop callback to write.
Back-end call in App.js
The only part left is the connection between the front-end and the back-end. I have to retrive the GeoJSON layer from the back-end and add it to the GridMap. First, let’s modify GridApp.js to handle this new GeoJSON layer on Leaflet map.
import React from 'react'
import { Map, TileLayer, GeoJSON } from 'react-leaflet'
function GridMap(props) {
function initialCenter() {
var initialLat = process.env.REACT_APP_INITIAL_MAP_CENTER_LAT || 49.8
var initialLng = process.env.REACT_APP_INITIAL_MAP_CENTER_LNG || 16.6
return [initialLat, initialLng]
}
function initialZoom() {
return process.env.REACT_APP_INITIAL_MAP_ZOOM || 4
}
return (
<Map center={initialCenter()} zoom={initialZoom()}>
<TileLayer
attribution='Tiles © Esri — Esri, DeLorme, NAVTEQ'
url='https://server.arcgisonline.com/ArcGIS/rest/services/Canvas/World_Light_Gray_Base/MapServer/tile/{z}/{y}/{x}'
maxZoom='16'
/>
<GeoJSON key={props.geojsonLayerId} data={props.geojsonOverlay}/>
</Map>
)
}
I added two properties:
- geojsonOverlay: GeoJSON feature/collection to add to the map.
- geojsonLayerId: This unique key must be modified each time the GeoJSON overlay is modified. This is needed to correctly refresh the map.
Finally I modified the App component to handle the state of the application.
import React, { useState } from 'react';
import { v4 as uuidv4 } from 'uuid';
import DroppingArea from './DroppingArea.js';
import GridMap from './GridMap.js';
import './App.css';

function App() {
  const [geojsonOverlay, setGeoJsonOverlay] = useState()
  const [geojsonLayerId, setGeoJsonLayerId] = useState()
  function handleDrop(files) {
    let data = new FormData();
    data.append('gridFile', files[0])
    fetch(process.env.REACT_APP_RAMUH_GRID_OVERLAY_PROVIDER_URL, {
      method: 'POST',
      body: data
    })
        .then(res => {
      return res.json()
    })
        .then(res => {
          setGeoJsonOverlay(res)
          setGeoJsonLayerId(uuidv4())
        })
  }

  function message(items) {
    if (items.length > 1) {
      return 'Please choose a single file'
    } else {
      return 'Drop your network file here'
    }
  }

  function isValid(items) {
    if (items.length > 1) {
      return false
    } else {
      return true
    }
  }
  return (
    <div className='App'>
      <DroppingArea handleDrop={handleDrop} message={message} isValid={isValid}>
        <GridMap id='mygridmap' geojsonLayerId={geojsonLayerId} geojsonOverlay={geojsonOverlay}/>
      </DroppingArea>
    </div>
  );
}

export default App;
A request is sent to the backend each time a file is dropped on the map. The output GeoJSON is sent to our GridMap, and a new layer key is generated each time, using uuid module.
It is now time to test it with our example cases. Do not forget to enable CORS in your browser when testing the communication between front-end and back-end.
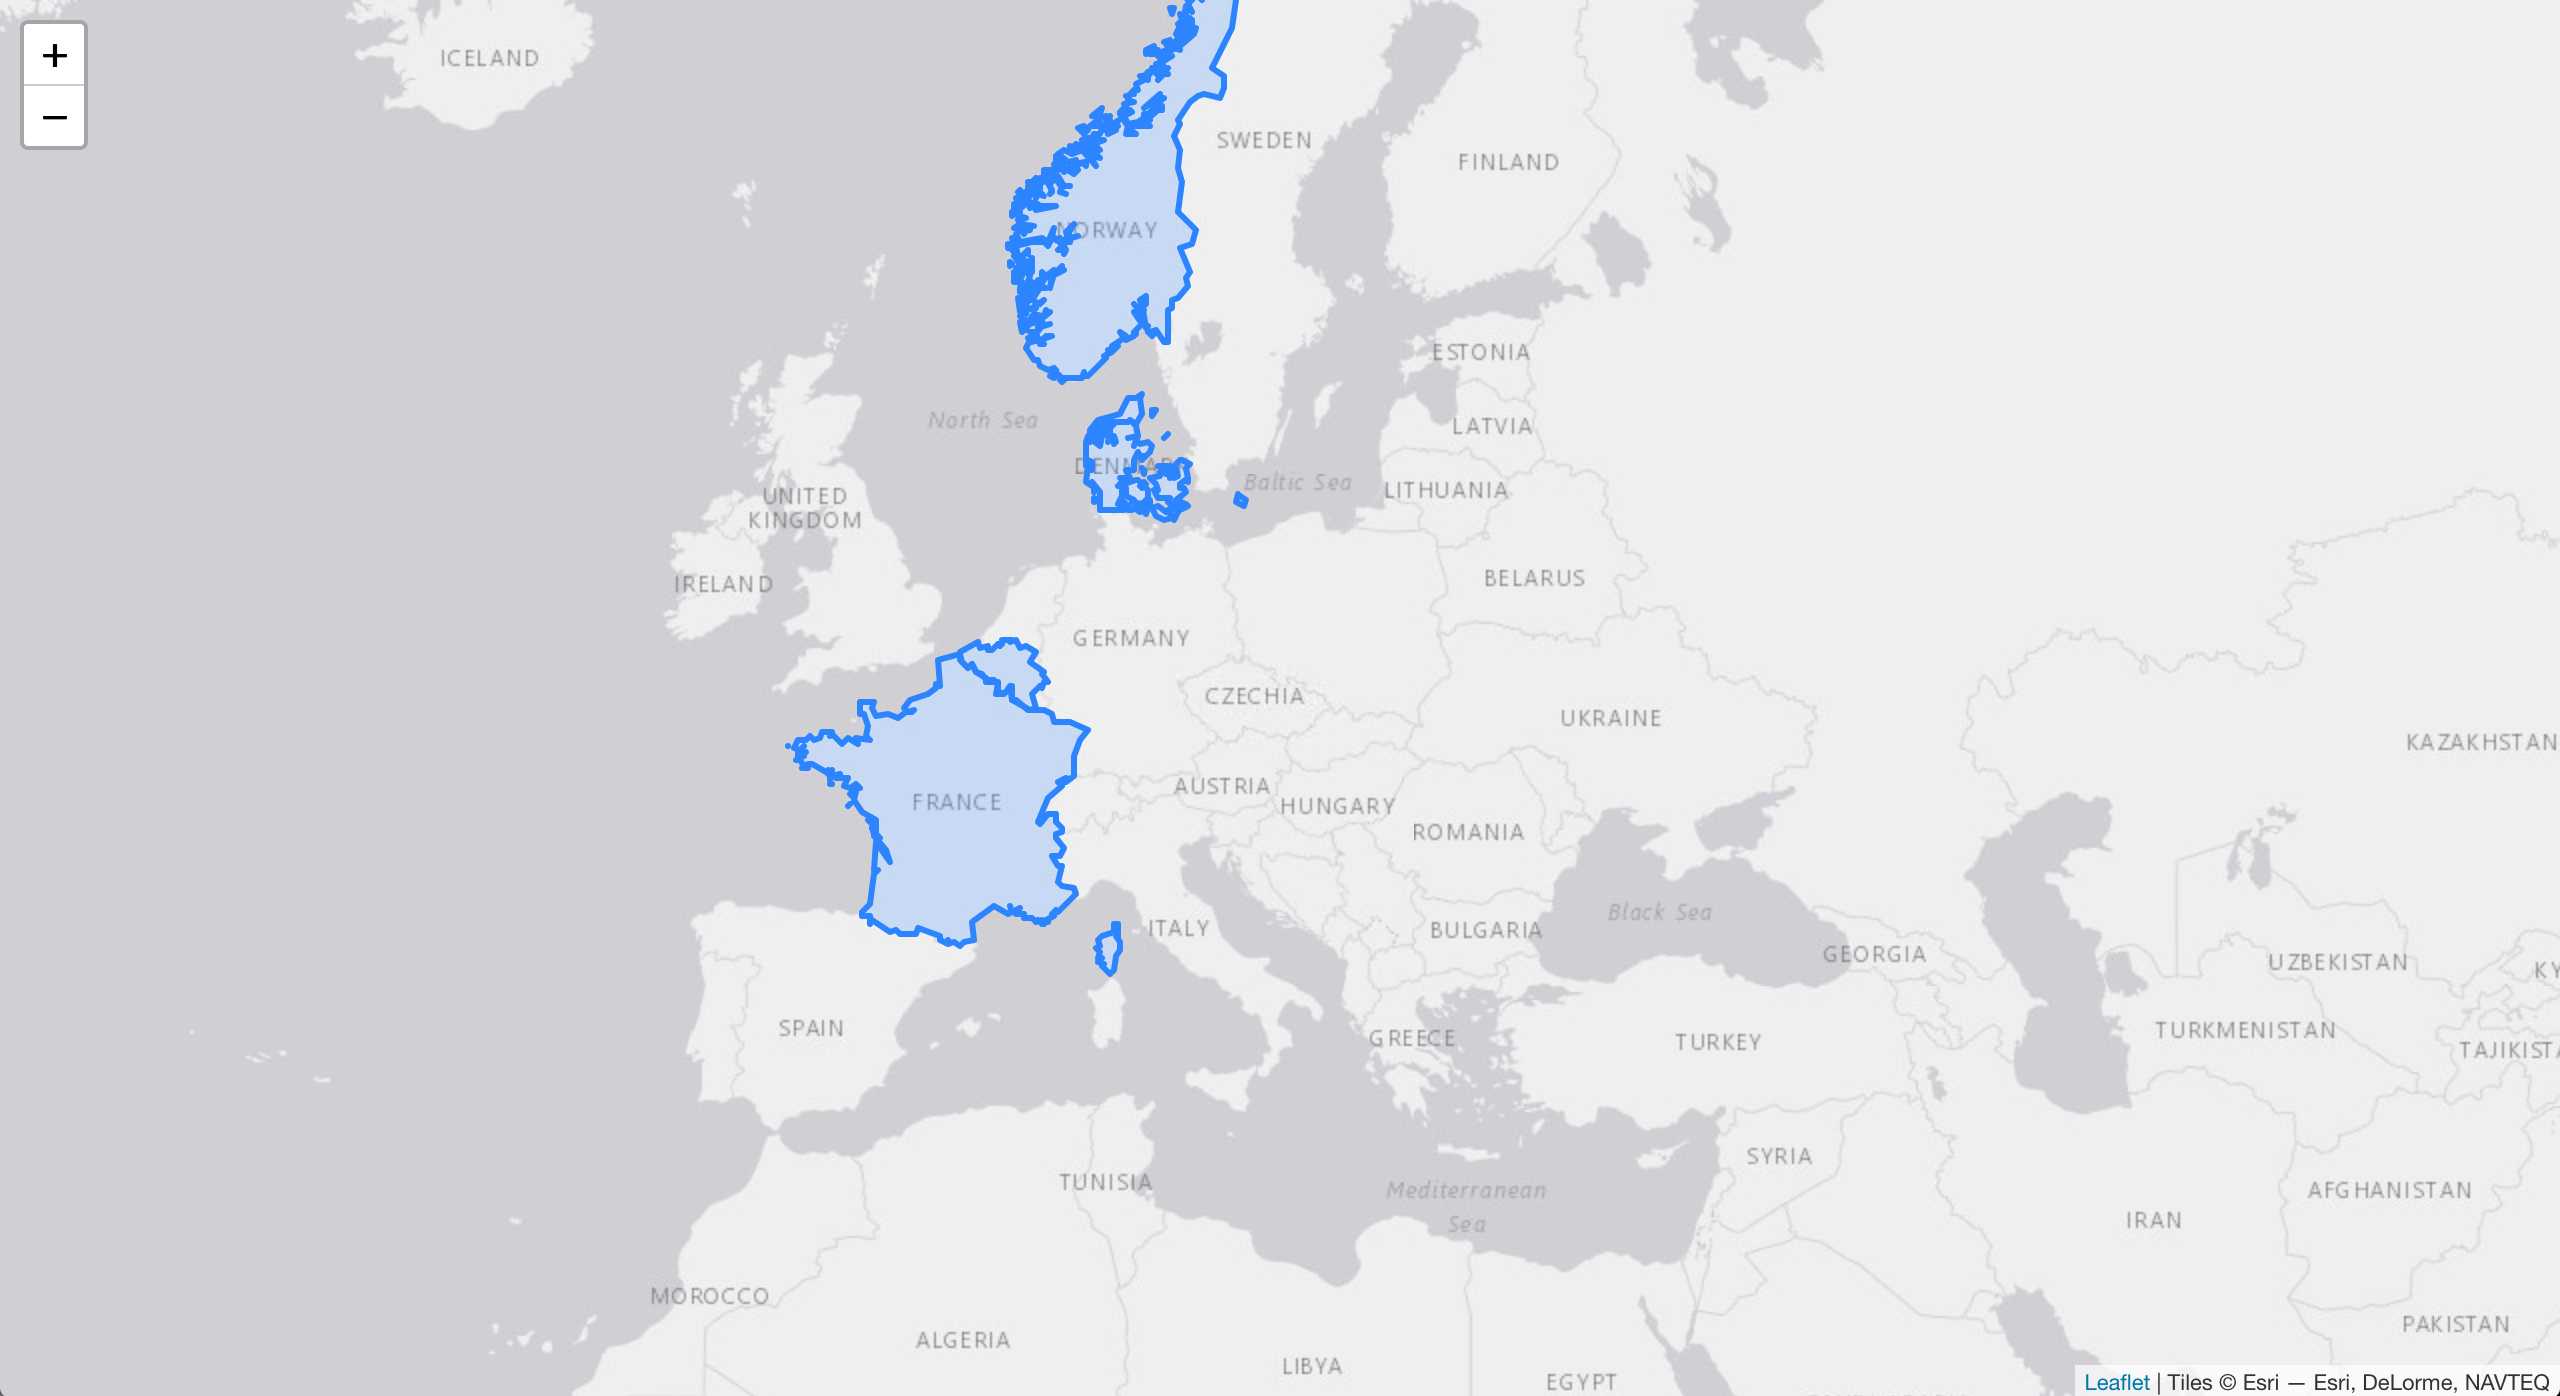
Example of Nordic32 case overlay
There are still many improvements to be done on this application:
- Exception handling: if an exception occurs on the back-end, the web application should at least show the user that something bad happened.
- Enhanced waiting process: some grid files parsing can be quite long - I am talking about you damned CGMES!
- Better user feedback: the end user should feel using the application that its actions has been taken into account.
But I want to keep it as simple as possible in this chapter. I consider it ok as it is for a walking skeleton. The final version is available on GitHub.
Conclusion
This post is long enough! Now we have a really simple application that is able to retrieve file input from a user, send it to our back-end application and modifies the map according to the file content.
However, our application is only available locally on our computer. In next post, we will focus on the application deployment on Google Cloud Platform using Kubernetes.
But that’s another story…
See you soon
Sébastien